BibaLorealParis Adidasjohnsons zivamehugoguccilocastolevis
https://designerplanet.in/contact/

Search This Blog

Friday, September 7, 2018

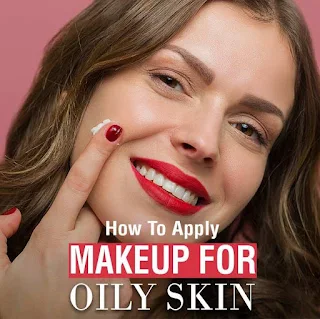
Makeup For Oily Skin 2018


Oily skin is a huge hassle and is difficult to find the right makeup product.Keep your makeup oil- and smudge-proof with these makeup tips.

After washing your face, apply a moisturizer right away. If you can, pick a moisturizer with SPF for added sun protection.

Always prime your skin first.
 

You should at least prime oiliest areas (think: theT-Zone -- forehead, nose, and chin) with an oil-free, anti-shine primer. Put it on after you've cleaned your face but before you put on foundation, powder, or other makeup.

Use a setting spray

Use a setting spray after you apply the primer. This will ensure the makeup sticks to the skin. Women with oily skin tend to suffer from melting or smudging makeup.

 Prep your peepers.

To cut down on eye makeup creasing, avoid priming your lids with concealer, something that Warren says many women with dark circles or redness do.

Instead, use a primer specifically designed for eyelids. The base creates a perfect canvas for eye shadow and liner while absorbing crease-causing oils throughout the day.

Apply eye primer

The last step of prepping the skin is to apply eye primer under the eyes. This will help the concealer and base makeup adhere to the skin better.

Conceal & Cover

Apply a light coverage concealer under the eyes.

Apply your foundation


Apply foundation evenly on your face. If you can, use airbrush foundation instead due to its finish. An airbrush finish is more matte than shiny or glossy.

Define your brows

Work on your brow game. Fill in your brows with a pencil and then finish up with a brow gel to add color and definition.


Eyeshadow prep

Apply lid primer to prepare the eyes for eyeshadow. Eyeshadow primers will help keep eye color in place longer so you don’t need to retouch frequently.

A peachy pink eyeshadow looks great in the summer. You can use your fingers to dab some color onto your lids once the primer is dry.

Finish your eye makeup

Curl your eyelashes and get it ready for some eyeliner and mascara action!

For your eyeliner, pick a waterproof one so that it doesn’t smudge on your eyes.

Apply mascara on your top and bottom lashes.

Apply pink or peach blush on your cheekbones for added color.

To complete the look, finish with a nude lipstick or lip gloss, whichever you prefer. A glossy finish is preferred especially in daytime.


Tips: Makeup Tricks And Hacks For Battling Oily Skin

Now that you have an idea of how to apply makeup when you battle with oily skin and what products you can use, here are a bunch of tips and hacks that will come in handy forever!

    We’ve already stressed upon the importance of using a primer for your face, but it’s also important to prep your eyelids. If you have oily eyelids, then for the love of eyeshadow, prep them with a product specifically designed for your eyelids. This step not only creates the perfect base for your shadow but also prevents it from creasing and fading through the day.
    Less is more! This applies to your powder as well. Going overboard often backfires by pushing more oil than usual through your pores.
    If you want to fix that shine midday, use a blotting sheet and press it on the oily area, and then roll it off your skin. This will soak up any excess oil without wiping your makeup off.
    To touch-up your face in times of crisis, carry a mineral powder in your bag! This won’t give you the caked-on powder look and will help make your face look shine-free, even, and natural. Crisis averted!
    When you have oily skin, dermatologists recommend exfoliating three to five times a week to slough away dead skin cells and control excess oil production.
    It’s important to use skin care products that specifically address your skin concerns. For oily skin, products containing ingredients like tea tree, bentonite or kaolin clay, and sulfur are amazing choices – be it your face cream, mask or cleanser.
    It’s important to not only moisturize your skin but also keep it hydrated. Drink a ton of water and incorporate products that contain hyaluronic acid into your regimen.
Concealer Face Makeup


 Concealer is available in so many shades and feature thicker formula, than foundation or powder. The main purpose of concealer is to hide minor skin imperfections, such as red spots, blue circles under eyes, etc.  Usually, the concealer is applied only in the areas where you need to mask something. Then you apply foundation, finish powder and are good to go.

How to apply concealer


If you are willing to use concealer instead of foundation to create that even coverage, here are 3 easy steps you should follow.


The under-eye area needs concealer most because the eye is set back in its socket, which lies in a shadow created by the surrounding bone structure. The skin around the eye also tends to be thinner than the skin on the rest of the face, so pigment discolorations and surface veins show through easily, making the under-eye area look dark and dull. The first thing you need, then, is a lightweight, flesh-tone concealer that is a shade or two lighter than your foundation.

If you don't have dark circles under the eye area, you don't need a concealer. If your foundation is opaque enough to even out the skin tone under the eyes, you don't need an extra product for that area.

 
Makeup with only concealer and powder

If you do not want to use foundation in your makeup and you want to gain that thick coverage, you may consider using concealer and powder. The procedure is pretty much the same as the regular concealer-based makeup. Yet, when powder is applied over concealer, you will gain more natural effect.

    Step 1.  Prep your skin and apply face primer or moisturizer.
    Step 2. Apply concealer over the face. You may use more than 1 concealer color for different areas.
    Step 3. Blend concealer well to avoid patchy look.
    Step 4. Use a paper towel to remove excess of the product.
    Step 5. Apply powder over concealer with a fluffy brush.
    Step 6. To make the face more sculptured, you may want to apply highlighter above the cheek bones.

Stick Concealers


Stick concealers come in swivel-up tubes like lipsticks.

Application: Stick concealers are applied to the under-eye area much the way a lipstick is applied to the mouth. Stick concealers can be applied over or under your foundation, depending on how much coverage you want--under the foundation provides less coverage and over the foundation provides more. Dab the stick concealer over the area in dots and then blend with clean fingers or a concealer brush.


After you have covered all the spots, set the concealer using some translucent powder or setting powder to make your makeup long lasting. Apply the powder with a large brush all over your face. Make sure that you use a small brush to reach the inside corners of your eyes and under your lash line to set the concealer. After setting the concealer, you can proceed with the rest of your makeup.

Best Foundation for Oily Dry and Sensative Skin | How to Apply Foundation - Designerplanet


Foundation is an essential part of make-up and is fairly simple to use, just apply and go on. It’s called foundation because it’s the base, or foundation, of your make-up and helps you look radiant. It’s a simple but important first step.As you get older, there are more things to cover, freckles, pigment, spots, acne—you've got to have a pretty specialized program to make sure your foundation gives you the best coverage and lasts all day
skin type:


....


    Oily Skin – Face gets shiny often and quick, blackheads and whitheads among other blemishes are common, minimal wrinkles or lines, large pores.
    Normal Skin – Small pores, face has few breakouts, surface is neither oily nor dry, even complexion, face has few lines, wrinkles and creases.
    Dry Skin – Ruddy complexion, undetectable pores, lines and wrinkles seen around eyes and mouth, cheeks and/or chin are dry and flaky, face feels as well as looks tight.
    Combo Skin – You have a combination of the above skin types. T-zone (central part of the face, including forehead, nose, and chin) is oily, enlarged pores on cheeks and chin, skin on cheeks is dry or normal, breakouts on nose, chin, cheeks or forehead.
    Sensitive Skin – Delicate or thin skin, blotchy patches in face (red or dry), sensitive to products (flushing or burning displays), prone to Rosacea (facial blood vessels enlarge; cheeks and nose have flushed appearance).

First, make sure you know all about the different types of foundation out there.


Best Foundation For Oily Skin

    Pressed powder foundation is the best choice for oily skin types.
    It has light to medium coverage and matte finish.
    It evens out the skin tone, protects, moisturizes and absorbs excess oil.
    Apply this foundation for oily skin using a kabuki brush.

Best Foundation For Dry Skin


....


    Cream foundations are great for dry skin types.
    Women who need heavier coverage and have uneven pigmenation could do with this one.
    It has medium to full coverage and dewy finish.
    It covers and conceals imperfections and discoloration on the skin.
    Apply using foundation brush or make-up sponge.

Best Foundation For Normal Skin

    Tinted moisturizer is a great choice of foundation for normal skin types.
    This is for those who need extra hydration and a touch of color.
    It has sheer to light coverage.
    It evens out the skin tone and imparts a ‘no make-up’ appearance.
    Apply using foundation brush.

Best Foundation For Sensitive Skin

    Mineral foundations are ideal for this skin type.
    It works well for those with sensitive skin or rosacea.
    It has light to medium coverage with matte finish.
    It evens out the skin tone, moisturizes, protects and absorbs excess oil.
    Apply using a kabuki brush.

Best Foundation For Mature Skin

    Liquid foundations are perfect for this skin type.

    It has light to medium coverage and the finish is satin, matte or dewy depending on the formulation.
    It smoothes out any uneveness in skin tone and provides added moisture.
    Apply using foundation brush or make-up sponge.

Best SPF Foundations

    Liquid Foundations work marvels for this requirement.
    There are different products out there with SPF 15, so choose accord

Now figure out which shade you should be using:


Before Applying Foundation

Prep Your Skin

The first and foremost tips to apply foundation is, a foundation will look good on your skin if it is smooth and clean. You can choose a simple cleanser to remove any traces of makeup, dust or grime from your skin. Next, tone your skin using an alcohol-free toner to tighten the pores and follow up with a moisturizer. If you have dry or flaky skin, you can scrub your face with a gentle face scrub and then tone and moisturize it.

Apply a Primer

If you have large pores, it will be helpful to use a primer. Face primers also help to make the foundation application process smoother besides helping it last longer.

There are different kinds of primers out there in the market. You can use the one that it is suitable for your skin type and skin condition. A primer acts as a barrier between your skin and its foundation, keeping your pores from becoming clogged. An important tip to applying a perfect foundation is, people with oily skin should use a gel- or a water-based primer while those with dry skin should use a cream-based primer.

Dot the Foundation All Over Your Face

The best way to ensure even foundation application is to first dot it all over the face. Pump out foundation at the back of your hand and use your finger to dot it all over your face.

You can use a foundation brush too but if you use your fingers, they can help you warm up the foundation slightly which will help to blend it well.

Also, start at the centre. When you look at someone’s face, the centre of the face is what the eye naturally focuses on and this is why you need to start from here and move outwards.

Use a Foundation Brush to Spread It Evenly

If you do not want to dot the foundation all over your face, you can skip tip 3 and use a foundation brush to spread the foundation all over the face. Start from the centre, slowly moving outwards in the direction of growth of your facial hair. Use small strokes for more control. Since most people have uneven skin tone, broken capillaries, large pores and/or blemishes, the centre of the face needs more coverage.

Take your time to really blend in the foundation all over your face. You can even use a damp sponge to apply your foundation. Always start with a small amount and slowly build the layers for more coverage.

 Powder your T-zone

Most liquid foundations can stay put for 2 to 3 hours before the facial oils start to break it. The foundation tends to slowly fade away during the course of the day. To stop this from happening, you can use a translucent powder to set your foundation. It will make it last longer and remove any extra shine. You can carry a compact with you for touch ups when your skin gets oily in the T-zone.

• Use tissue

Once you have applied your foundation make use of a tissue, tear it in two from the middle and open it up, place it on your face and let it absorb the excess moisture from your face. This trick will help your foundation last longer.

• For even complexion

Want to prevent your foundation from oxidizing into an orange color? Try blotting your face before and after applying your foundation to give you even complexion all day long.

A quick look now at the other three foundation types:

Applying Powder Foundation: Powder foundation offers the least coverage of the four but it is quite easy to use. Most of these foundations come in a compact packaging with an applicator that you can use. Though quite easy to use, one way to get the best results from powder foundation is to build it slowly for coverage. Otherwise, it can look a bit cakey and unnatural. Mineral powder foundations are great for oily skin.


Applying Cushion Foundation: You can apply a cushion foundation similar to a powder foundation even though it has a cream-to-liquid consistency. Just tap it all over your face and build it up in the areas where you need more coverage. These foundations usually have a dewy finish and look quite natural on the skin. Just like liquid foundation, they are usually great for all skin types.


Applying Cream/Stick Foundation: Stick foundations are making a comeback. They are more suitable for dry skin and people with oily skin will find these foundations to be a bit too heavy. To apply a stick foundation, run the stick all over your face in long strokes and then use a buffing brush to blend it all in. Make sure that you blend in the direction of the growth of facial hair to make it look natural. Set it with a loose powder to make it last all day.


And now for a final bonus tip: Choose the right foundation colour for your skin tone.

It is important that the foundation shade looks natural when you apply it to your face and that it blends well with your neck. If you are blessed with good skin, you can use a tinted moisturizer or BB cream to even out your skin tone and use concealer to deal with the blemishes, saving your foundation for special occasions when you want to look perfect.


More Foundation


Top 10 ProductsCheck Price
rimmel London Lasting Finish Full Coverage Foundation
Check Price
Lakme Absolute Mattreal Skin Natural Mousse
Check Price
L’Oreal Paris Infallible 24H Fresh Wear Foundation
Check Price
Revlon Colorstay Makeup
Check Price
Covergirl Outlast Active Foundation
Check Price
Dermacol Make-Up Cover
Check Price
Estee Lauder Double Wear Stay-In-Place Makeup
Check Price
Maybelline Super Stay Full Coverage Foundation
Check Price
Milani Conceal+Perfect 2 In 1 Foundation+Concealer
Check Price
Tarte Amazonian Clay Full Coverage Foundation
Check Price


Thursday, September 6, 2018

How to Apply Lipstick Correctly

 Lipstick is the most popular and versatile form of makeup. It has the ability to add just a hint of beauty or high drama to your look, depending on what you are going for. However, how you apply your lipstick will determine how good it will look and how long it lasts. While everybody will have their own technique or tricks for applying lipstick, if you follow these steps below you are sure to have a great finish.

The easiest way to apply lipstick is to start from the center of your lips and brush the lipstick outwards. Apply a second coat for a longer-lasting look. Blot your lipstick by closing your lips around your index finger and pulling your finger out. Read below to discover more details about lip liners, choosing the right color for your complexion, and much more!


What You Need

    lip balm, lip liner, lipstick, facial tissue

Follow These Steps


Prepare Your Lips

Gently go over your lips with a soft toothbrush to remove any rough or loose skin.

When applying moisturizer to your face, massage a little into your lips too. Don't, however, use lip balm, since this would impair the indelibility of your lip makeup.

Wipe the lip balm off, if necessary. Before you apply any lipstick or lip liner, check and see if there is any lip balm on your lips. If there is still some residue, wipe it off using a tissue or cotton bud. Any lip balm that's leftover will make your lips too slippery and prevent the lip liner and lipstick from sticking.

Setting Powder or Foundation

Professional makeup artists will tell you that priming your lips is a critical step in how your lipstick will look and how long it wears. It gives the lipstick something to hold on to, fills in any lines that might be present, and will minimize the chance of the lipstick bleeding. There are a few ways that you can prime your lips; you can use a setting powder or a foundation or you can use a lip liner as a base. If you are using powder make sure you apply lightly and remove any excess. The same goes for foundation. You can also use a lip liner as a base.

Use a lip liner
Choose a color that matches your lips, not your lipstick. Before drawing a line with the lip pencil, begin by dotting it at various points along the outline of your lips. Then, drawing very lightly, use the liner to connect the dots.

Apply Lipstick

The lipstick should be applied starting at center and moving outwards. You should apply at least two coats of lipstick, blotting in between coats.
Blot

Blotting serves to keep lipstick off of your teeth and to make the lipstick last longer. To blot the inside of your lips you can put your finger in your mouth, close your lips around it, then gently pull out your finger. You can also fold a sheet of tissue in half, place it between your lips and gently press down on the tissue.

Fixing Outside the Line

If you have lipstick on any area outside of your lip line, you can use concealer to fix it. You can use a cotton swab or a lip brush to take care of these areas, by gently touching them, making sure to blend the concealer into your foundation.

About Me

My photo
Hello This is Sakina Khatoon. My blog Provide real information on various aspects of your daily life, please follow me on social media for the latest blog. We value your ideas / suggestions / Feedback Please DM me on Instagram @designersplanets .

Search This Blog

Comments