BibaLorealParis Adidasjohnsons zivamehugoguccilocastolevis
https://designerplanet.in/contact/

Search This Blog

Monday, September 10, 2018

How to Wear Pearls and Stay Modern

 Pearls have always been considered an old-fashioned gem but at the same time, they are constantly being updated for the modern woman. No longer relegated to your Granny’s jewellery box, today’s pearls are fashion pieces that often replace diamonds as a girl’s best friend.

 White Pearls
 
 White pearls are by far the most popular pearl color of choice for most pearl jewelry shoppers. Loved for it's classic beginnings and it's modern versatility, white pearls are steeped in tradition. From birthdays and graduations to weddings and anniversaries, the classic elegance and easy versatility of white ensures that these gems will be treasured for a lifetime.

White pearls are the embodiment of elegance and femininity. Let us give you a few tips for finding the perfect white pearl piece.


Types of white pearls: freshwater pearls, Akoya pearls, South Sea pearls.

Overtones: in the white color family, overtones range from pink to a creamy, ivory, or silver.

The color of the Akoya pearls is determined by the nacre. White Akoya pearls, as a color category, encompass light creamy pearls as well as those with an overtone.

White South Sea pearls are the ideal choice for statement pieces because they are the largest pearls available. They are also the rarest cultured pearls available on the market because their shape is flawlessly round, which makes them luxury items. The white South Sea Pearls are more prominent in Australian harvests. Their natural colors range from brilliant white to a silvery sheen.

When it comes to white freshwater pearls, their pearl color is determined by the mussel itself and environmental factors that affect the nacre as it is layered. As you may have expected, white is the most popular color for freshwater pearls. The overtone can vary slightly under different lighting sources and ambient colors.

    Jewelry Piece - Every woman wants to have at least one white pearl piece in her jewelry box because they are the single most versatile accessories out there. They can be worn for virtually any event from casual outings and all the way to elegant soirees. This is why they make an excellent gift for women of all ages.

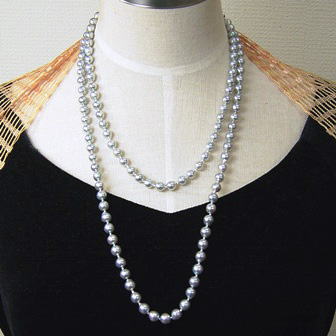
        Necklaces - A string of white pearls will provide any woman with a unique touch of elegance. There is nothing more graceful than a white pearl necklace, so this will make an excellent gift.


        Rings - White pearl rings make amazing engagement rings because they compliment a woman's femininity in a unique way. Multi-pearl rings are dazzling statement jewelry pieces that will make any woman stand out. White South Sea pearls are the ideal choice for statement pieces because they are the largest pearls available. 


        Bracelets - A Japanese Akoya pearl bracelet can turn ordinary attire into a chic outfit. You can opt for a classic single set of pearls if you are looking to buy a classic gift for your significant other.


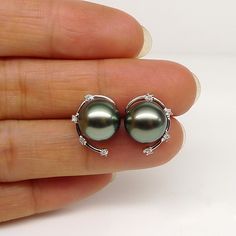
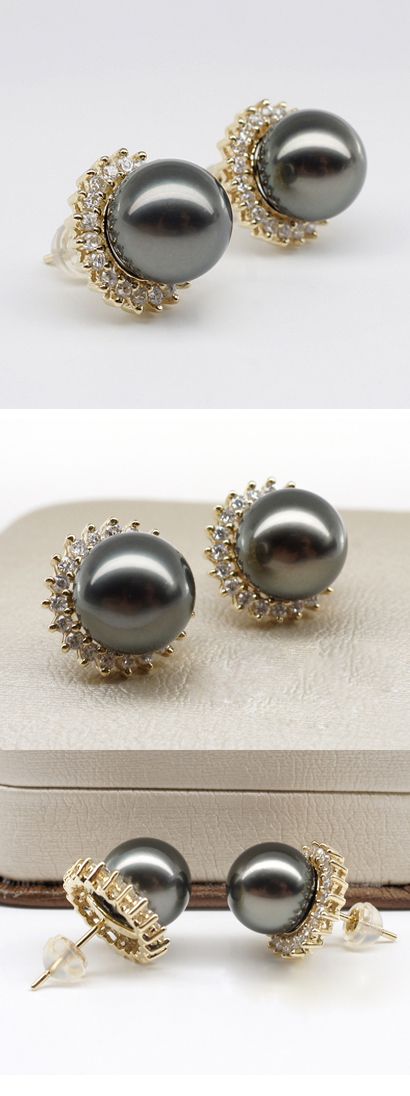
        Earrings - A white pearl earring set is the perfect accessory for the entire day. You can opt for the single-pearl version or you can choose the models with pearls and diamonds if you are looking for a special gift. Baroque shaped freshwater pearls are excellent for earrings because they can be adapted to a wide range of shapes.


        Sets - White pearl sets include rings, necklaces, and earrings and they are the ideal gift for any woman because they are amazingly versatile. 

        Loose Pearls - Opt for loose pearls if you would like to provide the recipients with the opportunity of choosing the jewelry pieces that the pearls will be added to.


How to Wear Pearls and Stay Modern

Pearls are even cited for their beauty in scripture — in the bible, Jesus compares the Kingdom of Heaven to a ‘pearl of great price’, while the Qu’ran says that dwellers of paradise will be adorned with pearls. According to Marco Polo, the Hindu kings of Malabar wore a necklace of 104 rubies and pearls, given from one generation of monarchs to the next.

Black pearls can be worn while running errands, meeting friends for drinks or hanging out with your buddies on a Sunday afternoon. The only thing you must keep in mind is to style your black pearl necklace correctly.

1. Layered Black Pearl Necklace

For a casual look to go with jeans, snickers and street-smart outfits, one of the best choices is to layer your black pearl necklace with other chains, faux pearl necklaces, beads and statement pendants. This way you will look young, fun and incredibly stylish. The best thing about this setting is that you can wear fake pearls and semi-precious gems together with your high-priced U.K. bought cultured black pearls.

2. The Statement Black Pearl Necklace

Such statement pieces usually come in sets, with earrings and bracelets, but you can also wear a single statement black pearl necklace to casual dates and regular girls’ night out sessions. It may very well come in gold finishing or feature other gemstones and precious metals. Such statement piece accents any type of casual outfit. You can opt for some dramatic designs as well – the long drop set is amazing!


Store carefully

Treated correctly, pearl jewellery can last a lifetime — making a timeless addition to a wardrobe, or perfect heirlooms for future generations. To ensure their longevity, proper storage is vital.

‘Never store your pearls in cotton wool,’ advises Warren, ‘this is the most vital piece of information pearl collectors should be aware of. Each pearl contains moisture, and if you put them in cotton, it draws that out and they crack. Pearl dealers in the Middle East wrap them in a silk cloth — follow suit, and wrap them in a silk handkerchief, or granny’s old silk petticoat.’

Friday, September 7, 2018

Makeup For Oily Skin 2018


Oily skin is a huge hassle and is difficult to find the right makeup product.Keep your makeup oil- and smudge-proof with these makeup tips.

After washing your face, apply a moisturizer right away. If you can, pick a moisturizer with SPF for added sun protection.

Always prime your skin first.
 

You should at least prime oiliest areas (think: theT-Zone -- forehead, nose, and chin) with an oil-free, anti-shine primer. Put it on after you've cleaned your face but before you put on foundation, powder, or other makeup.

Use a setting spray

Use a setting spray after you apply the primer. This will ensure the makeup sticks to the skin. Women with oily skin tend to suffer from melting or smudging makeup.

 Prep your peepers.

To cut down on eye makeup creasing, avoid priming your lids with concealer, something that Warren says many women with dark circles or redness do.

Instead, use a primer specifically designed for eyelids. The base creates a perfect canvas for eye shadow and liner while absorbing crease-causing oils throughout the day.

Apply eye primer

The last step of prepping the skin is to apply eye primer under the eyes. This will help the concealer and base makeup adhere to the skin better.

Conceal & Cover

Apply a light coverage concealer under the eyes.

Apply your foundation


Apply foundation evenly on your face. If you can, use airbrush foundation instead due to its finish. An airbrush finish is more matte than shiny or glossy.

Define your brows

Work on your brow game. Fill in your brows with a pencil and then finish up with a brow gel to add color and definition.


Eyeshadow prep

Apply lid primer to prepare the eyes for eyeshadow. Eyeshadow primers will help keep eye color in place longer so you don’t need to retouch frequently.

A peachy pink eyeshadow looks great in the summer. You can use your fingers to dab some color onto your lids once the primer is dry.

Finish your eye makeup

Curl your eyelashes and get it ready for some eyeliner and mascara action!

For your eyeliner, pick a waterproof one so that it doesn’t smudge on your eyes.

Apply mascara on your top and bottom lashes.

Apply pink or peach blush on your cheekbones for added color.

To complete the look, finish with a nude lipstick or lip gloss, whichever you prefer. A glossy finish is preferred especially in daytime.


Tips: Makeup Tricks And Hacks For Battling Oily Skin

Now that you have an idea of how to apply makeup when you battle with oily skin and what products you can use, here are a bunch of tips and hacks that will come in handy forever!

    We’ve already stressed upon the importance of using a primer for your face, but it’s also important to prep your eyelids. If you have oily eyelids, then for the love of eyeshadow, prep them with a product specifically designed for your eyelids. This step not only creates the perfect base for your shadow but also prevents it from creasing and fading through the day.
    Less is more! This applies to your powder as well. Going overboard often backfires by pushing more oil than usual through your pores.
    If you want to fix that shine midday, use a blotting sheet and press it on the oily area, and then roll it off your skin. This will soak up any excess oil without wiping your makeup off.
    To touch-up your face in times of crisis, carry a mineral powder in your bag! This won’t give you the caked-on powder look and will help make your face look shine-free, even, and natural. Crisis averted!
    When you have oily skin, dermatologists recommend exfoliating three to five times a week to slough away dead skin cells and control excess oil production.
    It’s important to use skin care products that specifically address your skin concerns. For oily skin, products containing ingredients like tea tree, bentonite or kaolin clay, and sulfur are amazing choices – be it your face cream, mask or cleanser.
    It’s important to not only moisturize your skin but also keep it hydrated. Drink a ton of water and incorporate products that contain hyaluronic acid into your regimen.

Concealer Face Makeup


 Concealer is available in so many shades and feature thicker formula, than foundation or powder. The main purpose of concealer is to hide minor skin imperfections, such as red spots, blue circles under eyes, etc.  Usually, the concealer is applied only in the areas where you need to mask something. Then you apply foundation, finish powder and are good to go.

How to apply concealer


If you are willing to use concealer instead of foundation to create that even coverage, here are 3 easy steps you should follow.


The under-eye area needs concealer most because the eye is set back in its socket, which lies in a shadow created by the surrounding bone structure. The skin around the eye also tends to be thinner than the skin on the rest of the face, so pigment discolorations and surface veins show through easily, making the under-eye area look dark and dull. The first thing you need, then, is a lightweight, flesh-tone concealer that is a shade or two lighter than your foundation.

If you don't have dark circles under the eye area, you don't need a concealer. If your foundation is opaque enough to even out the skin tone under the eyes, you don't need an extra product for that area.

 
Makeup with only concealer and powder

If you do not want to use foundation in your makeup and you want to gain that thick coverage, you may consider using concealer and powder. The procedure is pretty much the same as the regular concealer-based makeup. Yet, when powder is applied over concealer, you will gain more natural effect.

    Step 1.  Prep your skin and apply face primer or moisturizer.
    Step 2. Apply concealer over the face. You may use more than 1 concealer color for different areas.
    Step 3. Blend concealer well to avoid patchy look.
    Step 4. Use a paper towel to remove excess of the product.
    Step 5. Apply powder over concealer with a fluffy brush.
    Step 6. To make the face more sculptured, you may want to apply highlighter above the cheek bones.

Stick Concealers


Stick concealers come in swivel-up tubes like lipsticks.

Application: Stick concealers are applied to the under-eye area much the way a lipstick is applied to the mouth. Stick concealers can be applied over or under your foundation, depending on how much coverage you want--under the foundation provides less coverage and over the foundation provides more. Dab the stick concealer over the area in dots and then blend with clean fingers or a concealer brush.


After you have covered all the spots, set the concealer using some translucent powder or setting powder to make your makeup long lasting. Apply the powder with a large brush all over your face. Make sure that you use a small brush to reach the inside corners of your eyes and under your lash line to set the concealer. After setting the concealer, you can proceed with the rest of your makeup.

About Me

My photo
Hello This is Sakina Khatoon. My blog Provide real information on various aspects of your daily life, please follow me on social media for the latest blog. We value your ideas / suggestions / Feedback Please DM me on Instagram @designersplanets .

Search This Blog

Comments